How to Make a Stunning AI Poster With a Text Depth Effect
Turn any photo into a high-impact poster with a text depth effect using free AI tools. No graphic design skills needed — get professional poster results in under two minutes.
The kind of poster that used to cost hundreds of dollars and a professional designer can now be made in under two minutes with AI. The text depth effect — where bold type appears to sit behind the subject of a photo, creating a dimensional, layered look — has become the defining visual style of the moment. Here is how to use it to make your own poster.
What Makes the Depth Effect Look Like a Real Poster?
The reason depth-effect posters look expensive is the same reason actual print posters look expensive: layering. When type sits behind a subject rather than on top of it, the design has depth. The eye reads it as three-dimensional, as composed rather than pasted together.
Traditional designers achieve this in Photoshop using layer masks and careful manual cutouts. AI tools achieve it automatically — the subject detection model identifies the foreground, separates it from the background, and slots your text into the middle layer. The visual result is identical.
What Kind of Photos Work Best for a Depth-Effect Poster?
Not every photo makes an equally strong poster. Here is what to look for:
A strong, clear subject. A person with good contrast against the background, a product on a clean surface, an animal against open sky — all excellent. Complex scenes with many overlapping elements are harder for the AI to process cleanly.
A background worth keeping. Unlike a product shot where you want a clean white backdrop, depth-effect posters work best when the background is interesting — a textured wall, a landscape, a gradient sky, an urban scene. The background frames the composition.
Visual breathing room. The text needs space to live. If the subject fills the entire frame, there is no room for large type. The best depth-effect poster photos have the subject occupying about half to two-thirds of the frame.

How to Make the Poster: Step by Step
1. Start with your photo
If you are working from an existing photo, use it directly. If you want a fully custom scene, use ImgEditApp's AI image editor to generate or modify a background first — describe what you want in a text prompt and the AI will transform the image.
2. Open the text-behind-image editor
Go to ImgEditApp's text-behind tool and upload your photo. This is where the depth-effect compositing happens.
3. Generate the subject cutout
Click Generate Text Behind Image. The AI detects the foreground subject and separates it from the background in about 5–10 seconds. This creates the three layers your poster needs: background, text, subject.
4. Add your poster text
Type your word or phrase in the editor panel. For a poster, think typographically:
- Single words hit hardest: "RISE", "WILD", "DREAM", "POWER", "CREATE"
- Two-word combinations can work as taglines: "STAY WILD", "KEEP GOING", "BE FREE"
- A name or brand — if this is a promo poster, the subject's name behind their portrait is a classic format
Choose a font that fits the mood. Bold display fonts work for impact. Clean sans-serifs work for minimal, editorial aesthetics. Serif fonts give a vintage editorial feel.

5. Scale and position the type
This is the most important step for a poster that actually looks designed:
- Make the text large — it should span most of the image width
- Center it horizontally so the subject naturally overlaps the middle portion
- Adjust vertically so the hidden portion of the text falls behind the widest part of the subject
- Use the color picker to set text color: white on dark scenes, black on light scenes, or a color that complements the image
6. Export at full resolution
Hit Export PNG to download the completed poster. Pro users can also export as an animated video clip — ideal for Reels or TikTok where the depth effect plays back as a reveal.
Poster Design Ideas to Try
Event or concert poster. Performer's portrait in the center, artist name behind them in huge type. This is the formula every major music venue uses — the depth effect gives it a professional flyer quality.
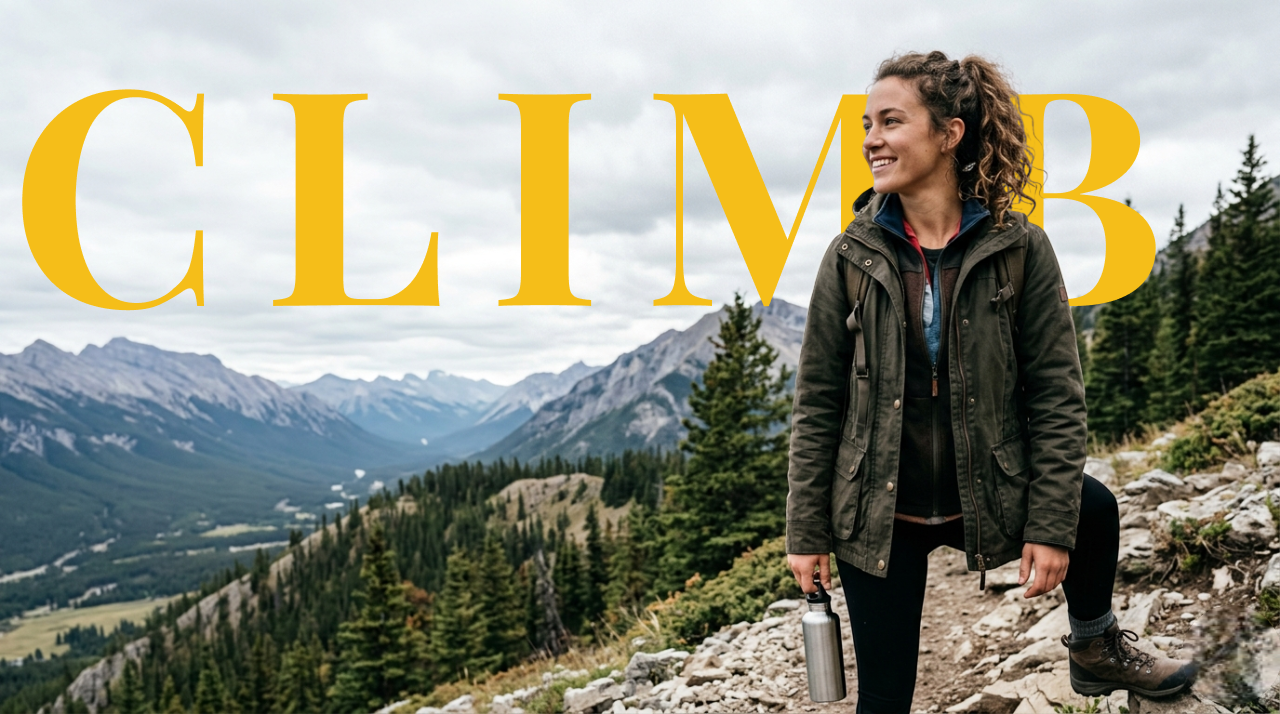
Personal photography print. Take your best portrait or landscape shot and add a single meaningful word. Turn a travel memory into a print-ready artwork without touching Photoshop.
Motivational or quote poster. Three-word quote fragment behind a figure. "KEEP GOING" behind an athlete. "STAY WILD" behind an adventure shot. Simple, typographically strong, highly shareable.
Product launch graphic. Product centered, product name or launch date in large type behind it. A clean way to announce new products on social media that looks designed, not assembled.
AI artwork poster. Edit your photo background with a text prompt in the AI editor, then apply the depth effect on top. Combine a custom AI-generated scene with layered type for fully original poster art.
Getting the Most Out of 49 Fonts
Free users get access to 10 clean, versatile fonts that cover most poster styles. Pro users unlock 49 fonts including:
- Heavy display typefaces for bold, impactful posters
- Elegant serif fonts for editorial and magazine-style layouts
- Handwritten and script fonts for personal, organic aesthetics
- Geometric sans-serifs for minimal, modern designs
Trying multiple fonts on the same layout is often the fastest way to find the right one — the editor makes it easy to switch without redoing your composition.
Ready to make your first depth-effect poster? Start free at ImgEditApp — no account needed for your first edit, no design skills required.